Showing posts with label fabric scraps. Show all posts

Tuesday, May 13, 2014

More Scrap Quilting Items


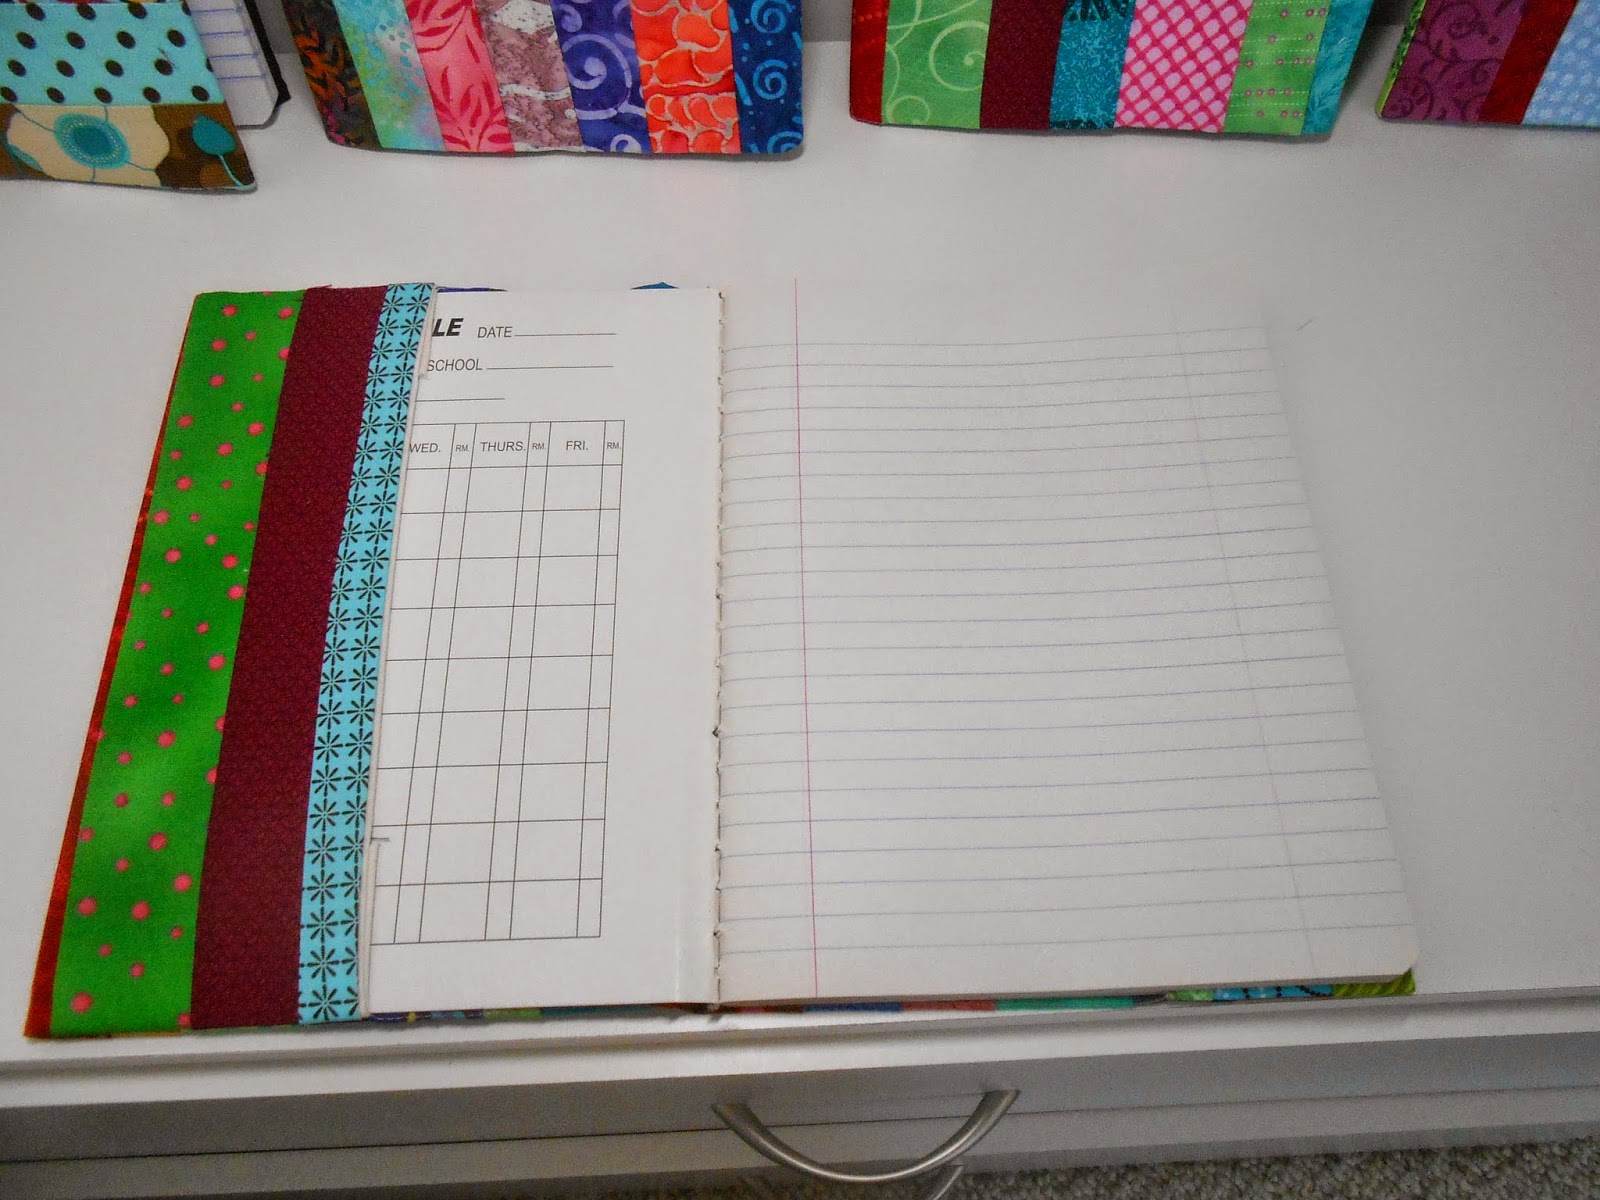
Continuing my scrap fabric clear out and have made quite a few new items.  Pieced cosmetic pouches, above.  Below are pieced composition books.  They were all quite fun to do and really knocked down my scrap.


 About a dozen composition book in total, in mostly random color combos.

 
Inside the piecing continues, the composition book slides into wrap around pockets, so when the composition book is used it can be replaced and continued to be used.


More shaped piecing, above my interpretation of a slice of watermelon, using some black buttons to be seeds.

 
As I worked through the scraps and make loads of yo-yo's in varying colors.  The above is a work in progress of an idea a large clutch that has been pieced and quilted with a sprinkling of these yo-yo flowers.  I have yet to complete any of these but plenty in the works.

Wednesday, March 5, 2014

New Items From the Scrap Basket

 
I have spent some time going through my mountain of scraps and making a few pieced items.  Before Valentines day I made a bunch of these heart coin purses.  And below a few houses with raw edge applique and an assortment of embellishments.


The piles started like this, sorted by colors, I spent about two days ironing and sorting by size, it looks so ready to go when done, and kind of a relief to do some sorting and tossing. 


I started with the hearts and just sewed like colors then cut into my heart shape.  I dropped these off at Yellow Door before Valentines, but I like them so much I added a few to my etsy shop, and plan to offer them for the year. 


For the houses, I sort of played around with the size and made the zipper at the top of the roof.  A variety of windows, doors and fun shapes go into each one.  I used rick rack, buttons, ribbon flowers and some random quilting to highlight each house. 


I really like these and will continue to make house zip purses in vary shapes and sizes.  I have a few variations and shapes I will be adding through 2014.


Wednesday, May 16, 2012

Bevy of Bookmarks all from Scraps

 
Yay!  That is my first thought at all these projects that use up scraps.  I save just about everything, and times when I don't save an odd and end I often regret it, I am going to refer to these moments as "never say never crafting supplies".

These bookmarks are made up of three elements of which I have been hanging onto for a long time.  Skinny fabric pieces, skinny interfacing pieces and small bits of ribbon.  Some fabrics are just too cute to throw away no matter how small, I already have quite a few items I offer from scraps, like mirrors, paperclip bookmarks, magnets, hair accessories, coasters...and more.  Now these bookmarks will be offered at some of my upcoming offline events.

This collection of fabric started simply by a leftover and thinking it looks just like a bookmark, the same thing happened with skinny interfacing leftovers too...hmm, fabric for cute and interfacing for body.  I have done these in another post a much more involved type of bookmark here, but I wanted fast and simple, so I cut down the steps and made about 40 of these in a few short hours.

I trimmed the fabric and interfacing to more or less the same size, thought this is not a requirement.  I did work in a common size for most about 2.5 inches wide by 9 inches tall, again it can be any size.  I did try to have the interfacing which will provide the stability to be about the same size.

My interfacing is medium or heavy weight fusible, so I first fuse to the back side of my fabric, layer with a backing fabric and trim the top with pinking blade or sheers.  Pin together to keep the pinked edge lined up.  This will be the top and where you will put the ribbon tab.  Again mainly relying on scrap ribbon using 11-12 inch piece loop and put edges inside the top of the book mark, inside about 1/2 inch.

These will be raw edged, so your layering would be right side up (interfacing should be sewn on) then your backing fabric should be right side down.

I did my start and stop stitch at the point where the ribbon is in the bookmark, and sew around the rectangle back to the start. I used about 1/4 inch seam, this can vary as needed or as you like.

Trim around all 4 edges with pinking blade or shears to cut down on raveling.

Behold this lovely pile of scraps is now a lovely pile of bookmarks, awaiting being stuck in a book.

Friday, March 2, 2012

March Flower Challenge Day two

I am on day two of my own little crafting challenge of making two Kanzashi flowers or yo yo's a day. I do not plan on blogging about this everyday but this is a project I have wanted to do, I will be offering these at Yellow Door soon.

Inspired by these little buckets I plan to make flower and yo-yo' flower bouquets. I will be mounting the flowers, embellished with buttons and mounted on lollipop sticks (aren't I clever?)

How cute are these little buckets, simple white with handle, they are really favor buckets that I will use to plant my Kanzashi flower into.

Tuesday, February 21, 2012

Quilters Band Aids

How cute is this idea and also so fast to make up a batch. I found this idea in a link party yesterday from The Moody Fashionista. I instantly knew I needed to make a few myself 'cuz as luck would have it I have fabric scraps. Here is a link to the original blog post that inspired my own creations, thank you!

What you need:
  • Fabric scraps, small scale images will work best
  • fabric band aids
  • hole punch - I used 1/8 inch
  • double sided tape, I used fix it strips
  • scotch tape
I first prepped the band aid, I actually used the scotch tape to hold the band aid closed on the paper side, as these are now open and also now less sterile, this will help a bit to keep it clean.

I had these fix it strips which were just about band aid size anyway, I cut in the middle where the padding will be on the band aid 6 1/8 inch holes to help with breathing.

I then put the double sided tape on the fabric side of the band aid.

Stick the band aid with the double sided tape to the back side of the fabric, trim to shape of band aid and you are done. Super sharp scissors help, or a rotary blade works nicely too, smaller blade is better for the curves.

Be the envy of all your sewing friends next time you get a boo-boo!
Related Posts with Thumbnails