 Early on in selling online I came up with these simple, low cost and colorful thank you notes. I had collected a lot of 12 x 12 scrapbook paper and often get the value packs at craft stores and this method utilizes the entire 12 x 12 sheet.
Directions assume some capability with Microsoft Word or other writing program, be sure to include your site address and a place to sign each card.
From each 12 x 12 sheet you will get:
2 folded 4 x 5.5" you can use to print your message
2 folded 2.75 x3.5" blank mini card to write a message
1 1 x 12" leftover
Supplies
- Assortment of papers
- Rotary cutter, mat and quilt ruler at least 12 inches in length
- Computer and printer
 Assortment of scrapbook papers
Using your rotary cutter/mat/ruler, trim the 12 x 12 inch sheets following steps:
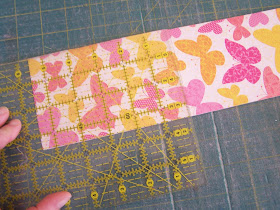
 1. Orient your pages so they are right side up, if there is an image orientation, with a rotary cutter you can cut multiple pages at a time, I did 5 sheets at once. From top cut off 1 inch, set aside, this will be a leftover piece.
 2. Remaining piece will be 11 x 12, from side cut off 3.5 inches. You will now have a group that is 3.5 x 11 inches, and a group that is 8.5 x 11 inches.
 3. From your 3.5 x 11 inch strips, cut in half at 5.5 inches, now these sheets can be folded in half to give you 2 blank 2.75 x 3.5 inch cards
 4. Your sheets will give you these pieces, you can now take your 8.5 x 11 sheet and print off your message inside. I use Microsoft Word and orient the text to the right, so when printed I can fold and open to see my message. It is a good idea to do a few practice sheets to make sure you have spacing correct, cut the test before using your scrapbook paper.
 5. After your sheet has gone through the printer cut at 5.5 inches, to get your two note cards.
 6. You will now have stacks like show above, all that is left to do is fold and tuck inside your orders.
Some ideas on what to include inside; thanks, custom order info, coupon codes, blog info, mailing list, upcoming specials events, selling venues. I also leave a a space to include a hand written edition to each note, about 1-2 inches works for me.
The little blank cards are great for a little hand written note and will hold a business card nicely as well.
Great tutorial! The papers you chose are so pretty.
ReplyDeleteThank you for posting how you make your thank you notes!
ReplyDelete~Kimberlee
www.TheSpunkyDiva.com