Thursday, September 30, 2010

Mass Producing, The Handmade Way with Chain Piecing

I often get asked how I make so many things, to me it is simple but really has been years in the making to do things very efficiently. I am a quilter for my part and sewing I do for myself, so I use lots of techniques used by today's quilter.

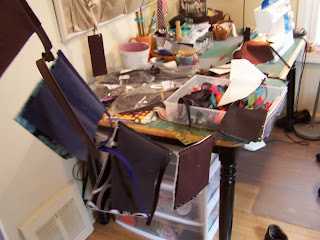
Organized chaos, zippers and fabric stacks ready to become coin purses and cosmetic pouches

My most utilize technique is "chain piecing" or chain sewing, this is sewing components or steps one right after another, feeding through the machine without stopping or breaking the stitch. The result is the pieces will be strung together in a "chain", snip the pieces apart and do the next step.

I organized my tasks/sewing into two categories: color/thread, and by feet I use on my machine, which are quarter inch foot, zipper foot and walking foot. I prep many many steps or pieces and organize them by foot and thread.

Stacks waiting to be sewn, sorted by color

I can then sit at the machine for long stretches and sew a single task, in these pictures I was working on coin purses and cosmetic pouches, or task "zippers" I work then in color, today was dark, for black and most browns for construction I will just use black throughout, or if it dark on the outside, like a navy I will do these with the black.

Sewing, one right after another, forming a "chain" coming off the back of the sewing machine

I have before sitting at the machine done all the cutting for outside, lining and interfacing, pieces they have been ironed already at this point (see sewing gremlin post). I assemble one side of the coin purse for each item created, continuously sewing and adding the next item, the result is a "chain" of half installed zippers. I stack the mate on my lap, when I get to the end I snip, flip the stack so the last one sewn is first and matches the stack on my lap, then add the second side of the coin purse.


This is a long "chain" stretched out from the sewing machine

Once these are completed I switch to my 1/4 inch foot, pin each coin purse front to back, same pin arrangement for each so I have a consistent pattern to sewing and removing pins, this also saves time. I chain this step too, sewing each front to back, outer and lining. Then I trim excess fabric, lining over hang zipper and leave for my sewing gremlin to turn right side out. I then sew linings closed by color, in this case black, brown and monofilament or clear quilting thread. While the 1/4 foot is installed I can do additional tasks in this case tissue cozies, I mix these in with the coin purses.

This is a nifty tool from Fons and Porter, a seam ripper standing upright to cut through the threads between items, watch out poking up it is very sharp, I use this next to the machine, saves cutting with scissors which saves times and the hands.

Items pinned and ready to be sewn together

Almost done, turn right side out, sew closed

Another "chain" last step close


In the end I completed 7 cosmetic pouches, 5 mini coin purses, 3 coin purses and 7 tissue cozies. I estimated I spent about 1 hour 15 minutes at the machine sewing these items.

I do virtually all of my creations with this technique, looking for common colors or tasks and organization prior to sitting at the machine makes me the most productive. I often have dozens and dozens of items in various stages of construction, this allows for me to complete 10-40 or more pieces in a day.

Wednesday, September 29, 2010

More Yellow Door Activity

It has been about 3 weeks since I signed on with Yellow Door, and it is full steam ahead to get ready. There is hardly a day that goes by without receiving, supplies, display pieces, hardware etc. I have also been furiously sewing, and have extra hands at night thanks to my husband. I have managed in the last few weeks to complete a total of 158 items, and it is actually *more* items then this as some of these are sold in sets. I am trying to average about 10 items a day completed.

I have 2 new offerings for Yellow Door, boxed accessory sets, and 3/12.00 bagged sets. I often do 3/12.00 items, but have new packaging for Yellow Door, since I need to price individually I had to switch up my normal displays.

The box sets are mostly coin purses with a matching pocket mirror and/or key fob. Pictured below, I still need to do a closure, which will most likely be elastic cord.

Boxed accessory sets, I will have 15-20 of these by grand open

I have revamped my 3/12.00 items into lunch sack style cello bags, bought online from etsy shop InTheClear, and Labels from WhiskerGraphics. I think this is an awesome presentation, each set includes a mini coin purse, pocket mirror and tissue cozy, with tissues of course.

3/12.00 sets, I should have about 20 of these ready for grand open 11/1/10

I have just about everything I can get for displays for now, when I see the space I will make some additional choices to complete my area. I have been all over including Ikea, Home Depot, Home Goods, you name it. I stopped at The Home Depot and got the paint swatches so I could decide upon colors, I am pretty sure I will do a two tone booth using the 2 green choices, I need to shop for fabric for table coverings, which I am still deciding on this as well.


Paint choices left, yellows, mushroom and greens. My two tone selection right

Stopped into Catching Firefly's on Saturday to pick up post cards to hand out everywhere, I blab it up and hand out these lovely cards.

Grand Opening: November 1st, 2010!


Sunday, September 26, 2010

Simple but Cute Thank You Notes


My 5 year old recently discovered the joy of rubber stamping, I think she actually likes digging through them more the stamping. She is finally old enough to do some stamping, with me sitting with her anyway.

As she stamped away I made some super easy thank you notes. I used card stock and just stamped random squares in pink and green, I used chalk ink.


I then cut the cards into 4.25 inch squares, stamped a purse image and a "Thank You So Much" folded diagonally with a scorer and done. Great handmade touch to send out with my creations.


Custom Order Sneak Peek

Shopping bags in progress, thought it would be fun to see them in action.

I use my basic sewing supplies to make the bags, and the pattern template I made drafted from an actual plastic bag. I rounded corners and made the handles and opening symmetrical. Pins, rotary cutter and scissors to complete cutting.

Pinned and ready to be cut

This pieces that has been removed is about 5 x 6 and becomes the pocket on the drawstring bag.

I can *almost* say I used every inch of this fabric. In the end I had about 1 inch leftover.

Friday, September 24, 2010

Jazzed Up Oatmeal Power Meal


This is a great start to the day or as a power lunch. I make simple oatmeal and add the following items for a quick meal.
  • Oatmeal
  • Ground Flax Seed
  • Brown Sugar
  • Cinnamon
  • Vanilla
  • Banana - sliced
  • Chopped pecans or walnuts
  • Splenda
  • Milk
Make desired amount of oatmeal following given directions, I add the ground flax seed with the oatmeal, about a heaping TBLS. When oatmeal is just to boiling mix it a TBLS or so of brown sugar and sprinkle of cinnamon. When you remove from heat add vanilla then, a 1/2-1 tsp to taste, stir.


Transfer to bowl and garnish with any and all the toppings. I finish with a sprinkle of Splenda and about 1/2 cup of milk.

That was good!!!

Display Pieces for Yellow Door


Metal pedestal stand found at yard sale - $2.00

I have been getting display pieces ready to go for Yellow Door. I have a budget of $300.00 for these items, though this is not written in stone, I would actually like to do it for less. In my 9 x 6 foot space I am planning the following items, some I already had around the house that are not being used or can go for a trial run.
  • Table, this will be in the back corner of my space, we have a few small dining type tables so I am going to use one from home. Undecided if I will cover it with a table cloth or covering. This will hold baskets with accessories, I hope to do some tiered display and am still considering options.
  • Headboard, we purchased a long thin table like headboard from Ikea, and though it is assembled we have never used it as a headboard, it is more like a sofa table. We won't miss it for a few months and I think it will look great, it is dark wood. This will go the entire depth of my space on one side.
  • Piano Bench, I managed to snagged a used one at a local fund raising estate sale event for Habitat for Humanity a great piece to nest under my table for only $10.00.
  • Hooks and waterfall purse racks, these have been ordered and will be along the back wall as a focal point looking into the booth area.
  • Baskets, buckets and containers, I need lots of these and have been hitting a few garage sales to get some deals as well. I often use Longaberger baskets in my displays so swapping these out with lower cost options. I posted a few pics below, along with my great finds.
  • Small tables, plant stands, racks, shelves, floor displays, I am considering lots of items but will make decisions once I see the space, which will be early October.
Rectangular wire basket new Target - $10.00

Collection of 3 wire baskets yard sales - $1.25 for all 3

Black Metal Basket yard sale - $3.00

2 New Baskets and Bowl - $7.00 each

2 Tiered Leaf stand church rummage sale, was new with tags - $5.00, this is also sitting on my headboard display piece

I have a few more ideas that I will be deciding upon, mostly I will have a small corner to fill out and want to do some type of hook display system for wristlets. Trips to Ikea, Bed Bath and Beyond, Hobby Lobby, Home Depot and Home Goods are in my future.

Lots to plan and get organized...STILL

Wednesday, September 15, 2010

My Three Ring Binder


If you are like me you are always juggling paperwork. I use a three ring binder as one of my vessels and recently jazzed it up with some photo collages from my items.

I had to print some pictures for an upcoming show and used a local grocery store for prints, for about 9 cents a piece I got 15 pictures printed. They looked so amazing that I wanted to use some for embellishing my boring white binder.

When I went to order more prints online using Snapfish, I realized I could get 8 x 10 inch photo collages and got the front cover. I was able to add a title, and pick up locally for $2.99. You could use up to 30 pictures and can randomize them until you get a look you like. I then did a few 5 x 7 inch prints for the back, one with totes taken outside and one of just wristlets. You did not have the title option for this size, they were .79 cents each.

Back Cover, using 2 5 x 7 inch collage prints

They looked amazing, this would be a great option for a photo album or if you need or use pictures in show displays. I am thinking about making up a few for a new artist market I am doing.

Tuesday, September 14, 2010

A New Ballerina


Today was a big day, my daughter started her first ballet class. Kind of hectic start but I am sure it will settle down and she will have a blast.

Her new bag in tow, we were completely decked out, she was super excited when we got there her new ballerina slippers were waiting...no surprise, she LOVED them.

Monday, September 13, 2010

Christmas Gift Bags


I have a variety of Christmas gift bags made up, that are planned for offline events. I will offer a few here and there in my etsy shop. In the meantime if you like any shown I can add them as a custom order for you, a few I have multiples. They are $4.00 or 3/$10.00


Addams Family Still Life


I have been out and about scooping up baskets and containers for an off line shop I am going to be part of soon. I got this nifty metal container along with these odd silver and black metallic fruit. I actually tried to leave the fruit behind but was convinced to take them along.

I brought it home and put it all on my black granite counter and was struck by the fact it was a rather creepy display and now call it my Addams Family Container, and snapped this pic I call "Addams Family Still Life".

I think the container will look much better filled with handmade goodies, I plan to use it for key fobs.

Looks MUCH better with colorful key fobs!

Sunday, September 12, 2010

I Have a Sewing Gremlin


You know you have wished for gremlins to come in over night and finish some tedious task. My gremlin is actually my husband, the above stack was waiting for me in my sewing room this morning. Of course I knew it would be waiting as he often helps me with the loads of ironing that goes into my items.

While the above looks neat and orderly I can assure you he spent about 3 hours at the iron, and never complains. He loads up on DVD's or books on tape and relaxes on the couch with his elaborate sorting system and quietly irons for hours.

He has been actively helping with the construction of my items for about two or three years, it was the last time the Detroit Red Wings were in the Stanley cup playoffs, or won I don't recall. He pretty much never sits and watches tv (in fact he did not own a tv prior to us being married) so it was odd to see him sitting there night after night. It dawned on me, he could be helping while sitting so we tested a few tasks that he was ok to do and that I trusted him to do.

Since then we have a system in place and I have let go almost completely these tasks to wait for his time to help. On average he will help 2-3 nights a week during busy times. I am prepping for fall and the holidays so this will probably be the norm with a few nights added in along the way.

Not only is the help GREATLY appreciated but it helps to keep me organized and with a system. I need to make sure I have enough stuff waiting for it to be worthwhile for him to help.

He does an awesome job and often is better then I would do as he is focused just on these items. I often find these tasks to laborious, though very important and he pays great attention to the details. With these tasks mostly off my plate I can foucus my energy on planning, cutting and sewing.

I am sure to thank him constantly for his efforts as I know I would get about half as much done without my gremlin!
Related Posts with Thumbnails